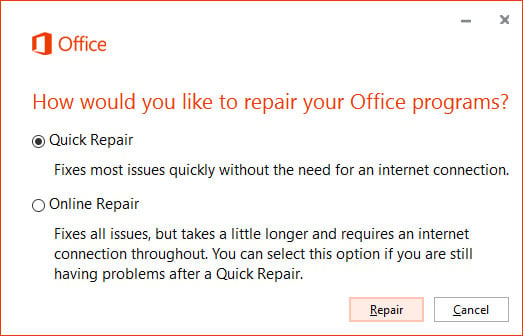
Office Repair is a great way to troubleshoot many issues within Microsoft Office. It scans the entirety of office and fixes any corrupted or missing files.
Windows
- Close Word and any other Office programs.
You should do so now; otherwise, you’ll be asked to do so again later.
- Search Control panel in start menu.
- Choose Control Panel.
- Below the Programs heading, click the Uninstall a Program link.
Don’t freak out: You’re not uninstalling Word. The link should read “Uninstall or Change a Program,” which is the title of the Control Panel screen you see next.
- Select Microsoft Office from the list of programs.
The name may be subtly different, such as Microsoft Office 2016 or Microsoft Office 365.
- Click the Change button.
The Office Repair utility runs, showing a screen similar to the one shown here.
 The Office Repair utility.
- Choose Quick Repair.
If this choice doesn’t work, go back and choose Online Repair when you try again.
- Click the Repair button.
- Click the Repair button again to confirm.
- Wait.
The Office Repair utility attempts to figure out what’s wrong. What happens next depends on whether anything is fixed. If something needs attention, obey the directions on the screen. If everything is fine, you see the Done Repairing message (even if nothing was actually wrong).
- Click the Close button.
Office repair can take anywhere from 5 minutes to 1 hour depending on how many files are broken.
Mac
Unfortunately, Mac does not have an option for Office Repair. Your best best is to try and uninstall office and reinstall it.