-
Select Calendar  , then the live event, and Join.
You can adjust your microphone and camera before joining the event as a producer. You also have an option to join as an attendee. Just select Join as an attendee instead.
Notes:
-
You will only join as a producer if you're the organizer of the event or if the organizer assigned this role to you when they scheduled the event.
-
To produce a live event, you need to join the event on the desktop app. The ability to produce on the web is coming soon!
-
Producers can't blur their backgrounds yet. That, too, is coming soon!
-
If your event is taking place in a large room, you might want to use Auditorium mode to enhance the audio for remote attendees and allow them to hear things like laughter and applause from the live audience. Just turn on the Auditorium mode toggle to enable it.
Be sure to test this mode in rehearsal, and, for the best experience, don't use your computer's built-in microphone.
Note: Auditorium mode must be turned on before the event starts, and can only be controlled by the first producer to join.
-
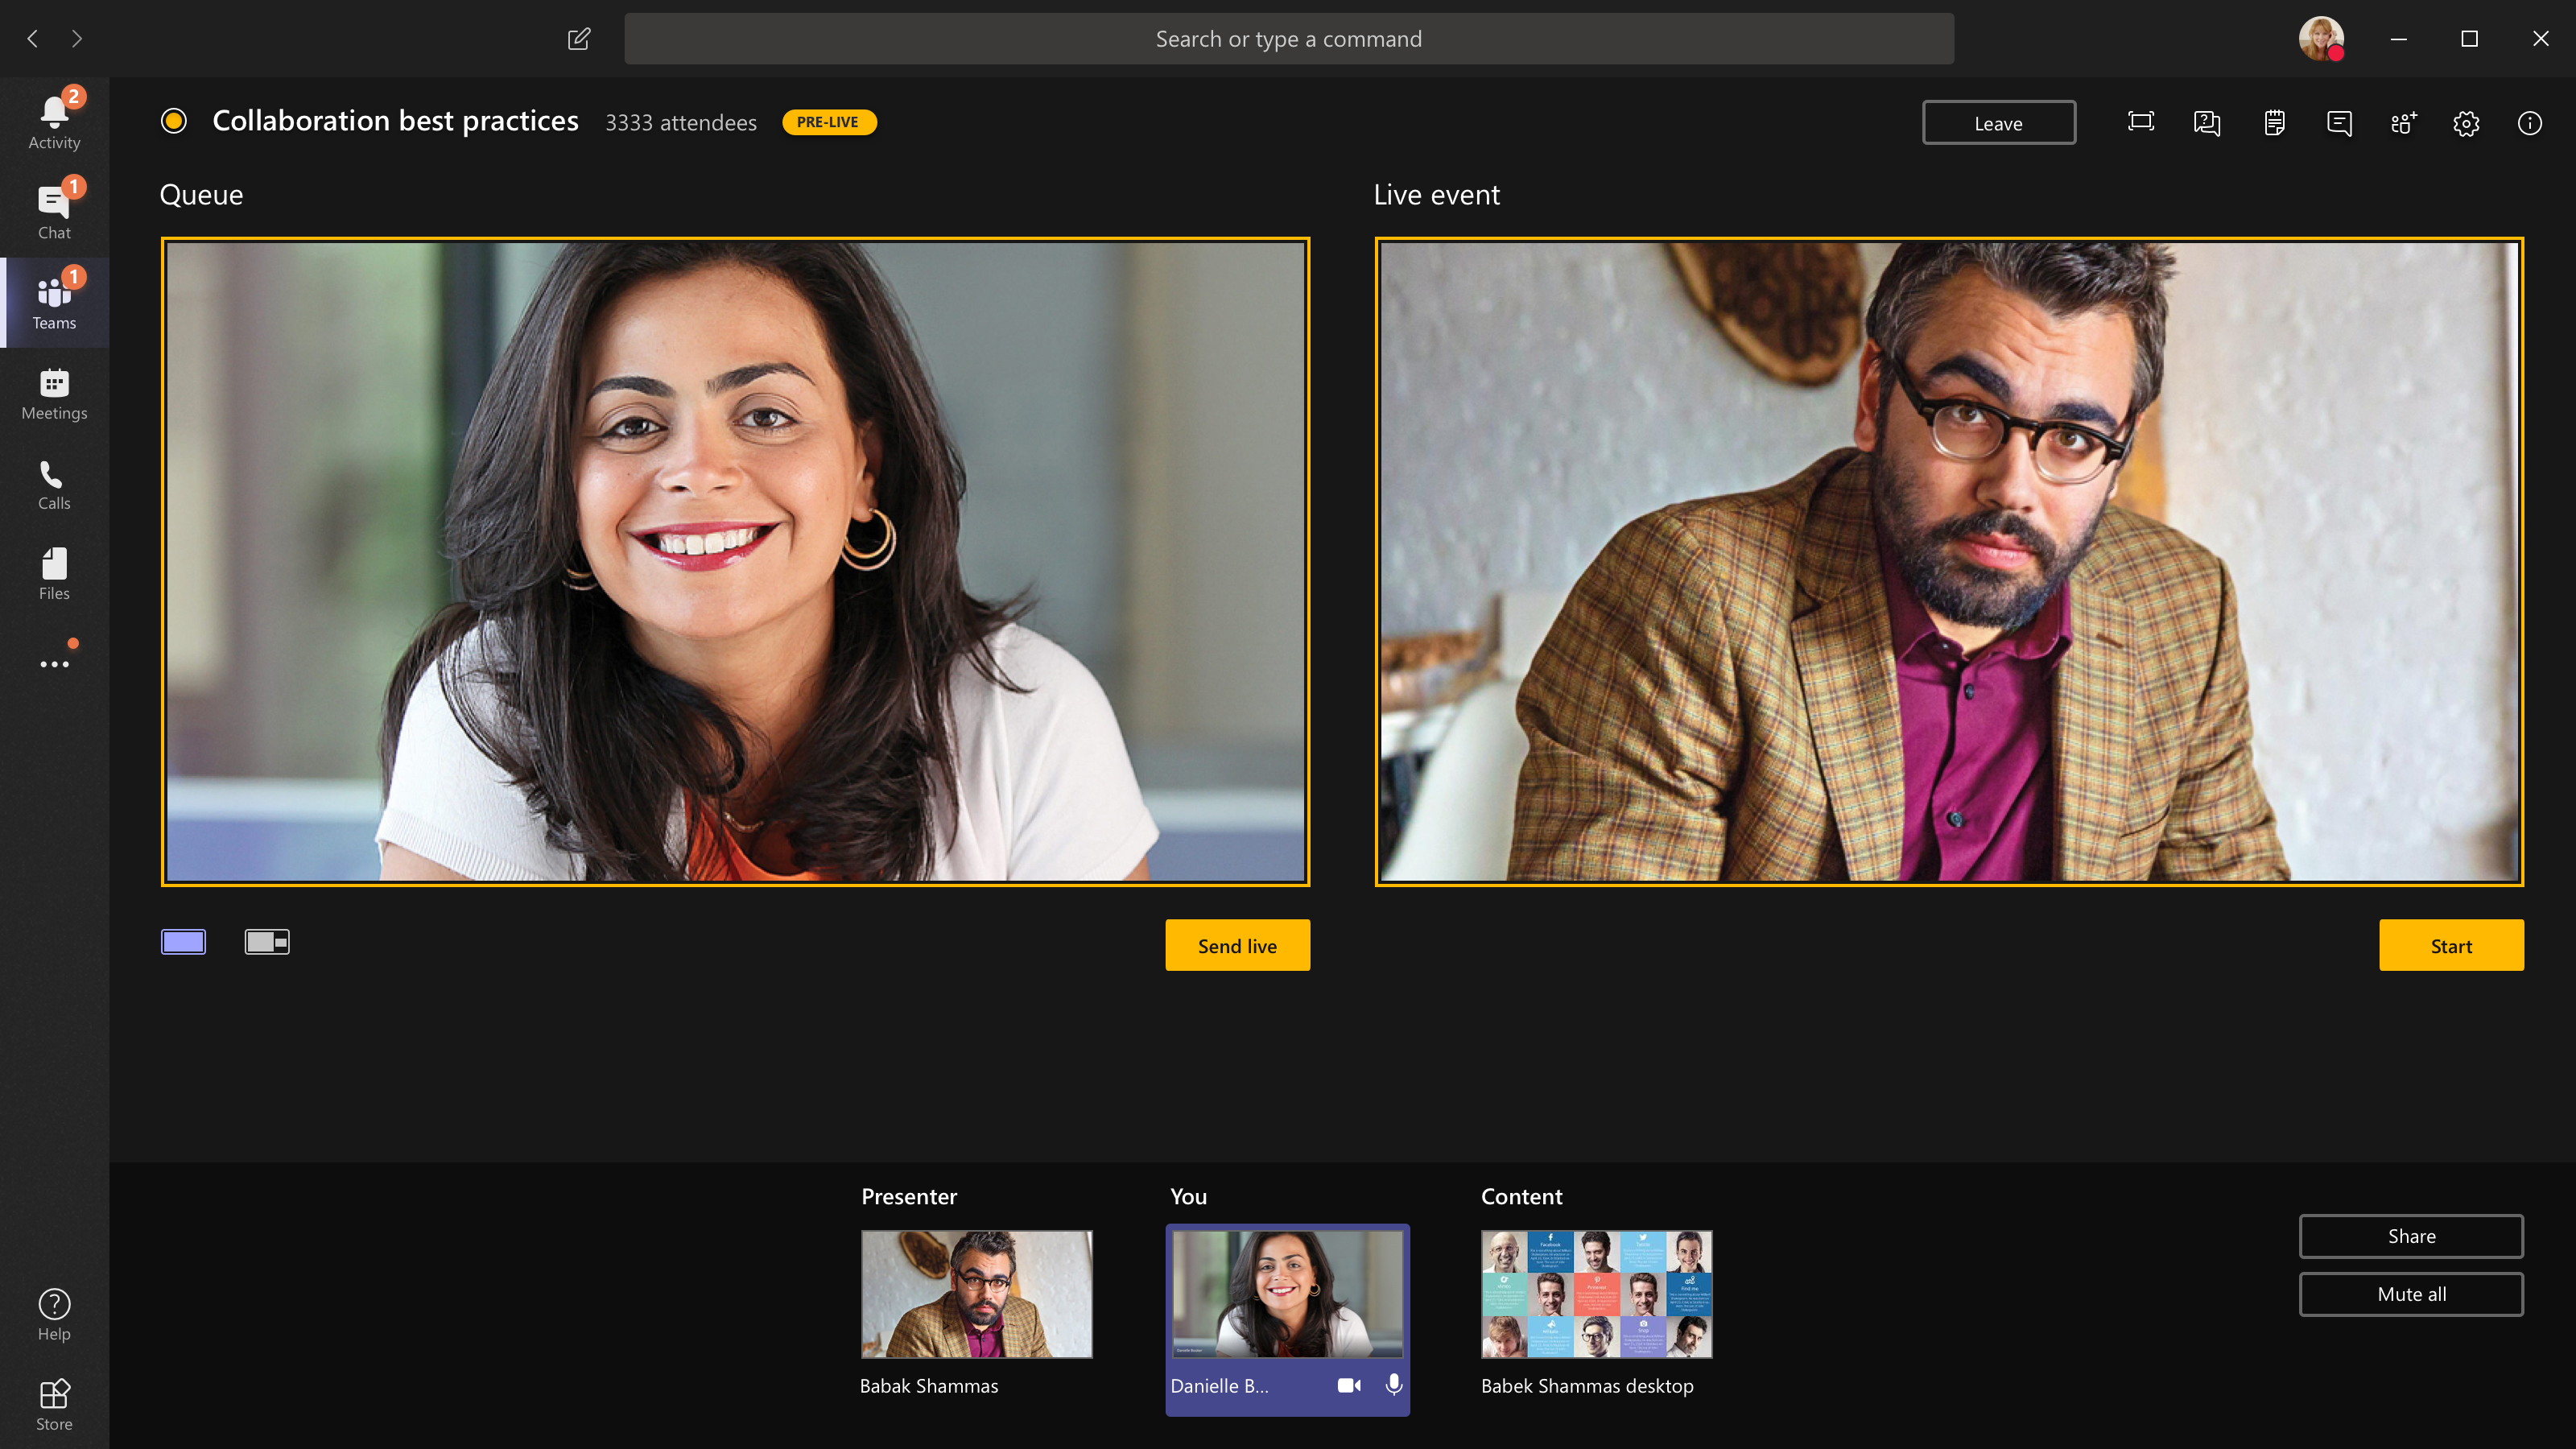
If you're producing in Teams, turn on your camera.
-
Select your camera feed at the bottom of the screen to preview it in your queue (on the left) before sending it to the live event (on the right).

-
Switch to a different camera by selecting Switch camera at the bottom of your queue or going to Device settings and selecting a new camera.
-
Select Send live to send the feed from preview to the live event.
-
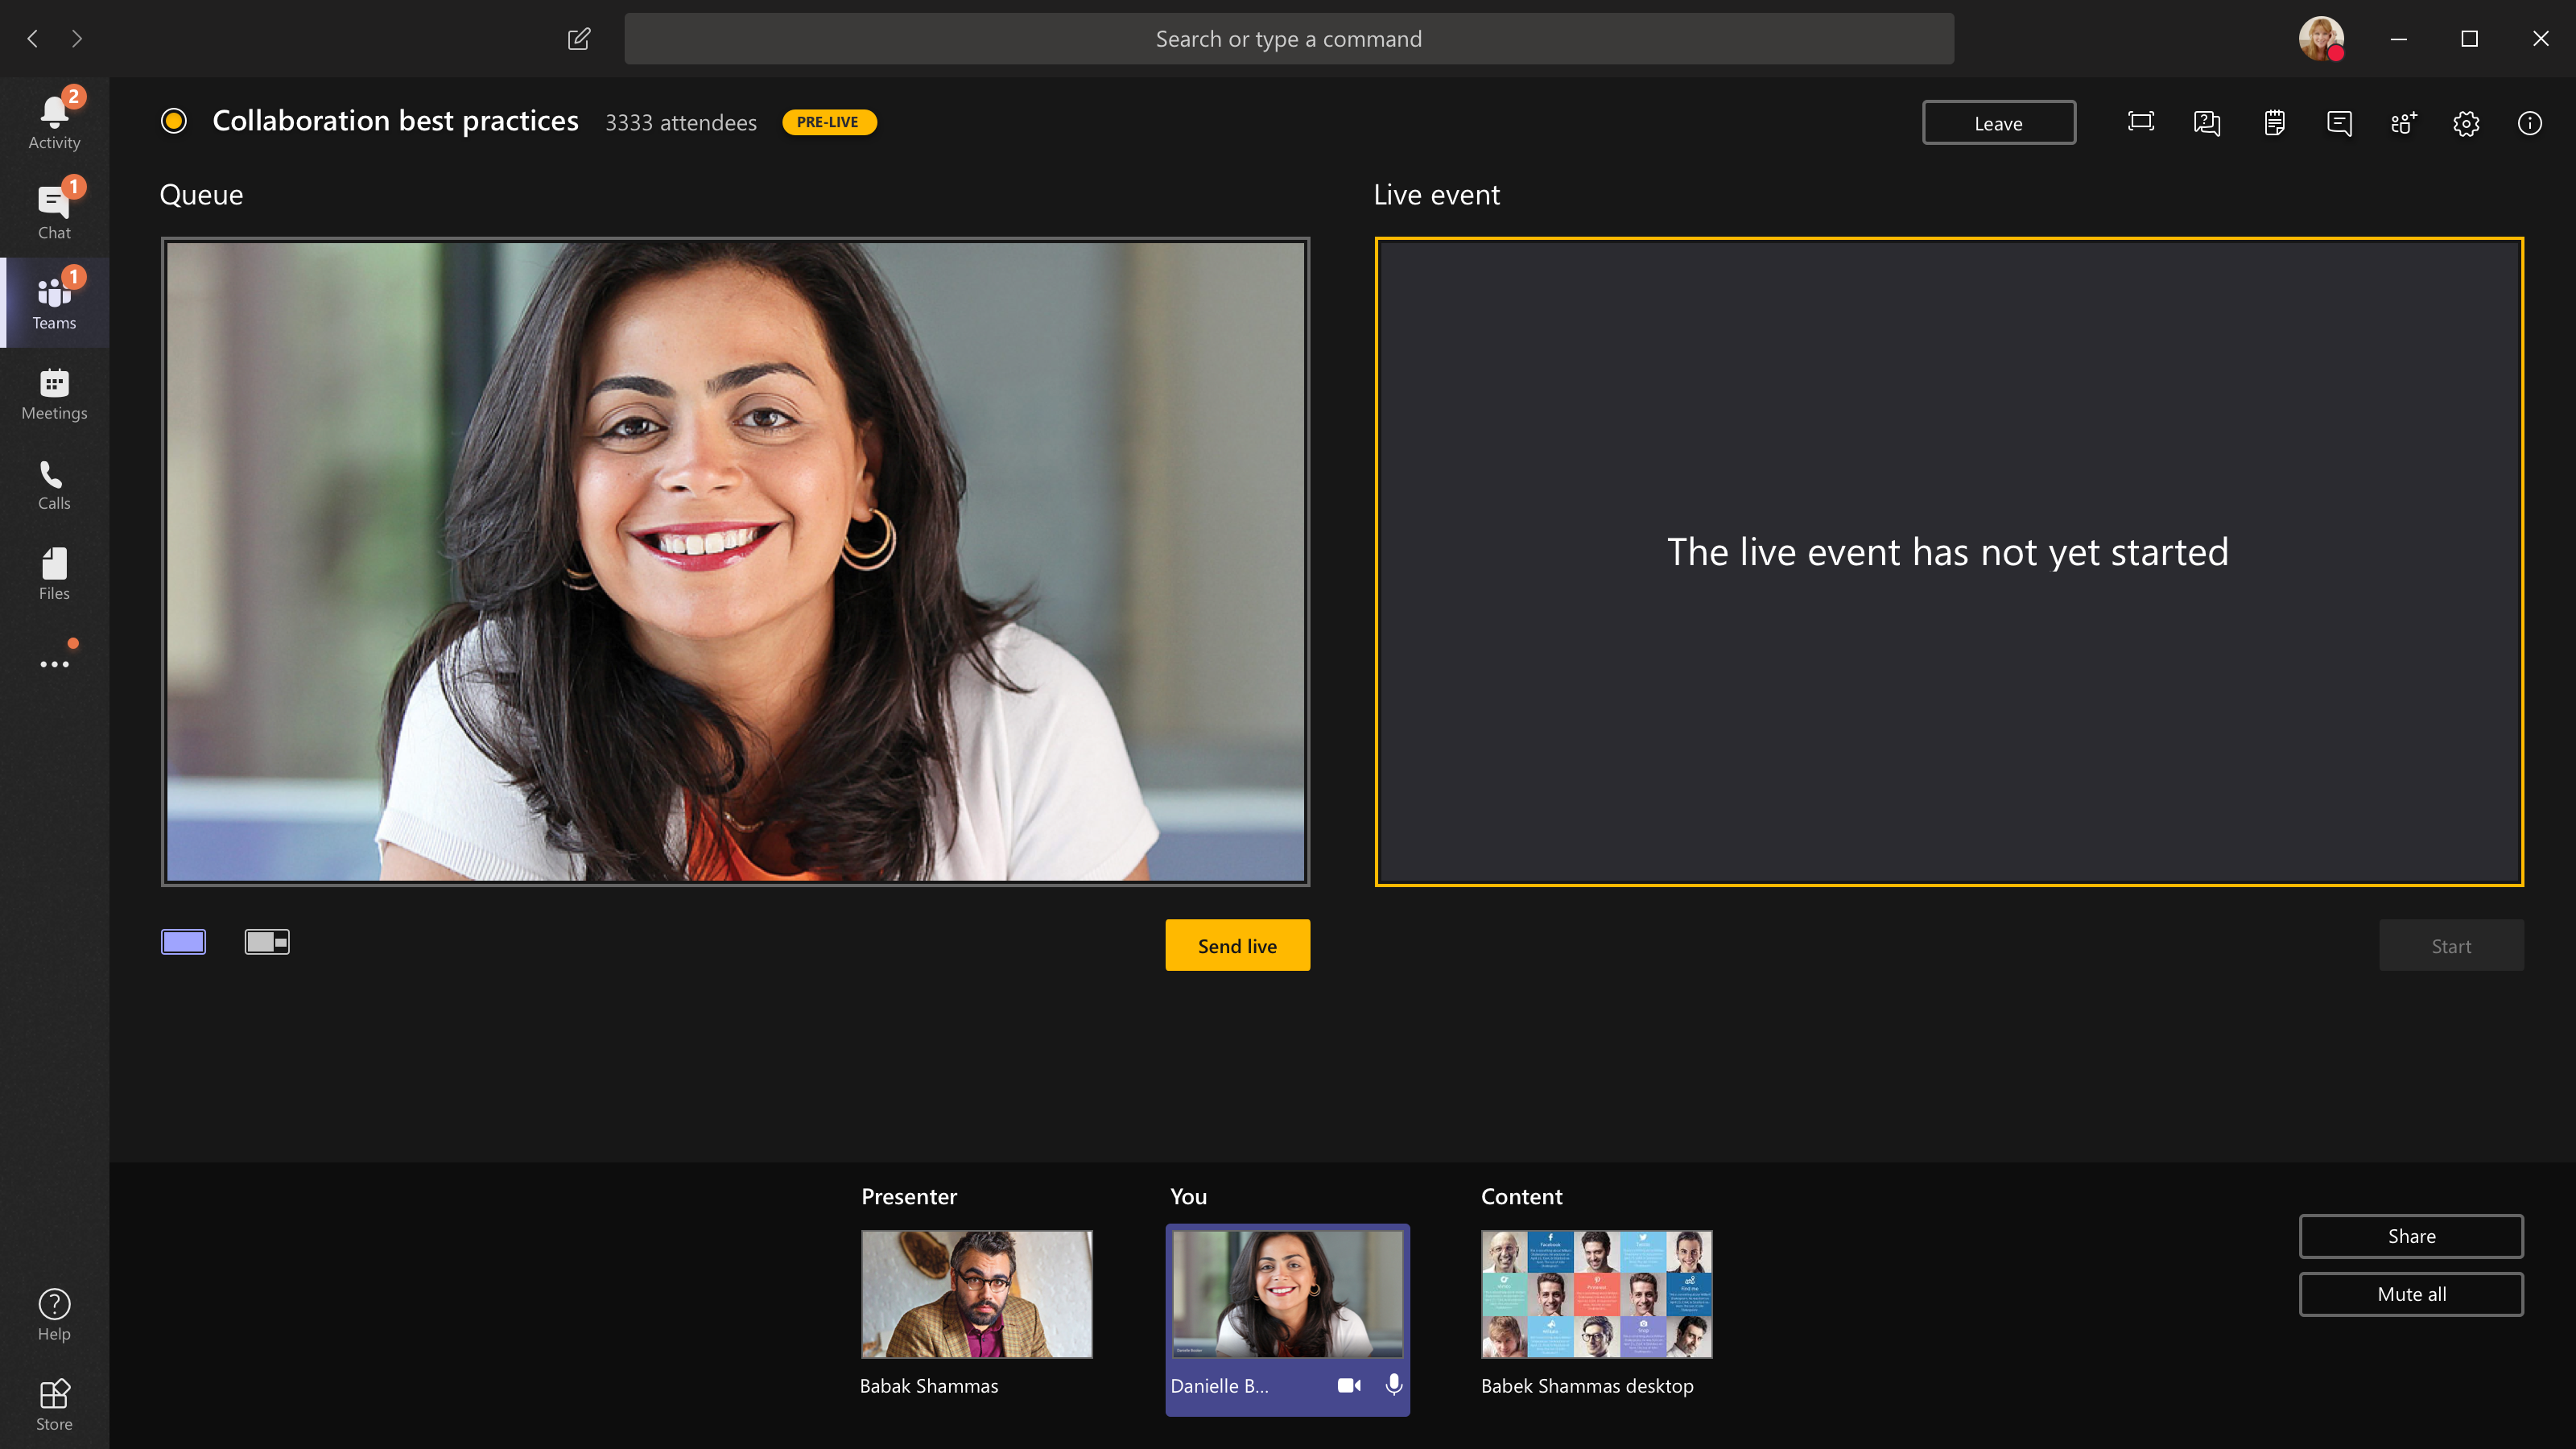
Select Start to start broadcasting live to your attendees!
Notes:
-
Once the feed goes live, the highest supported resolution is 720p.
-
Mute any producers or presenters who aren't actively speaking. If they're not muted, their audio will go live to attendees.
-
There's a 15– to 60–second delay from the time a media stream is broadcast to when attendees see it.
-
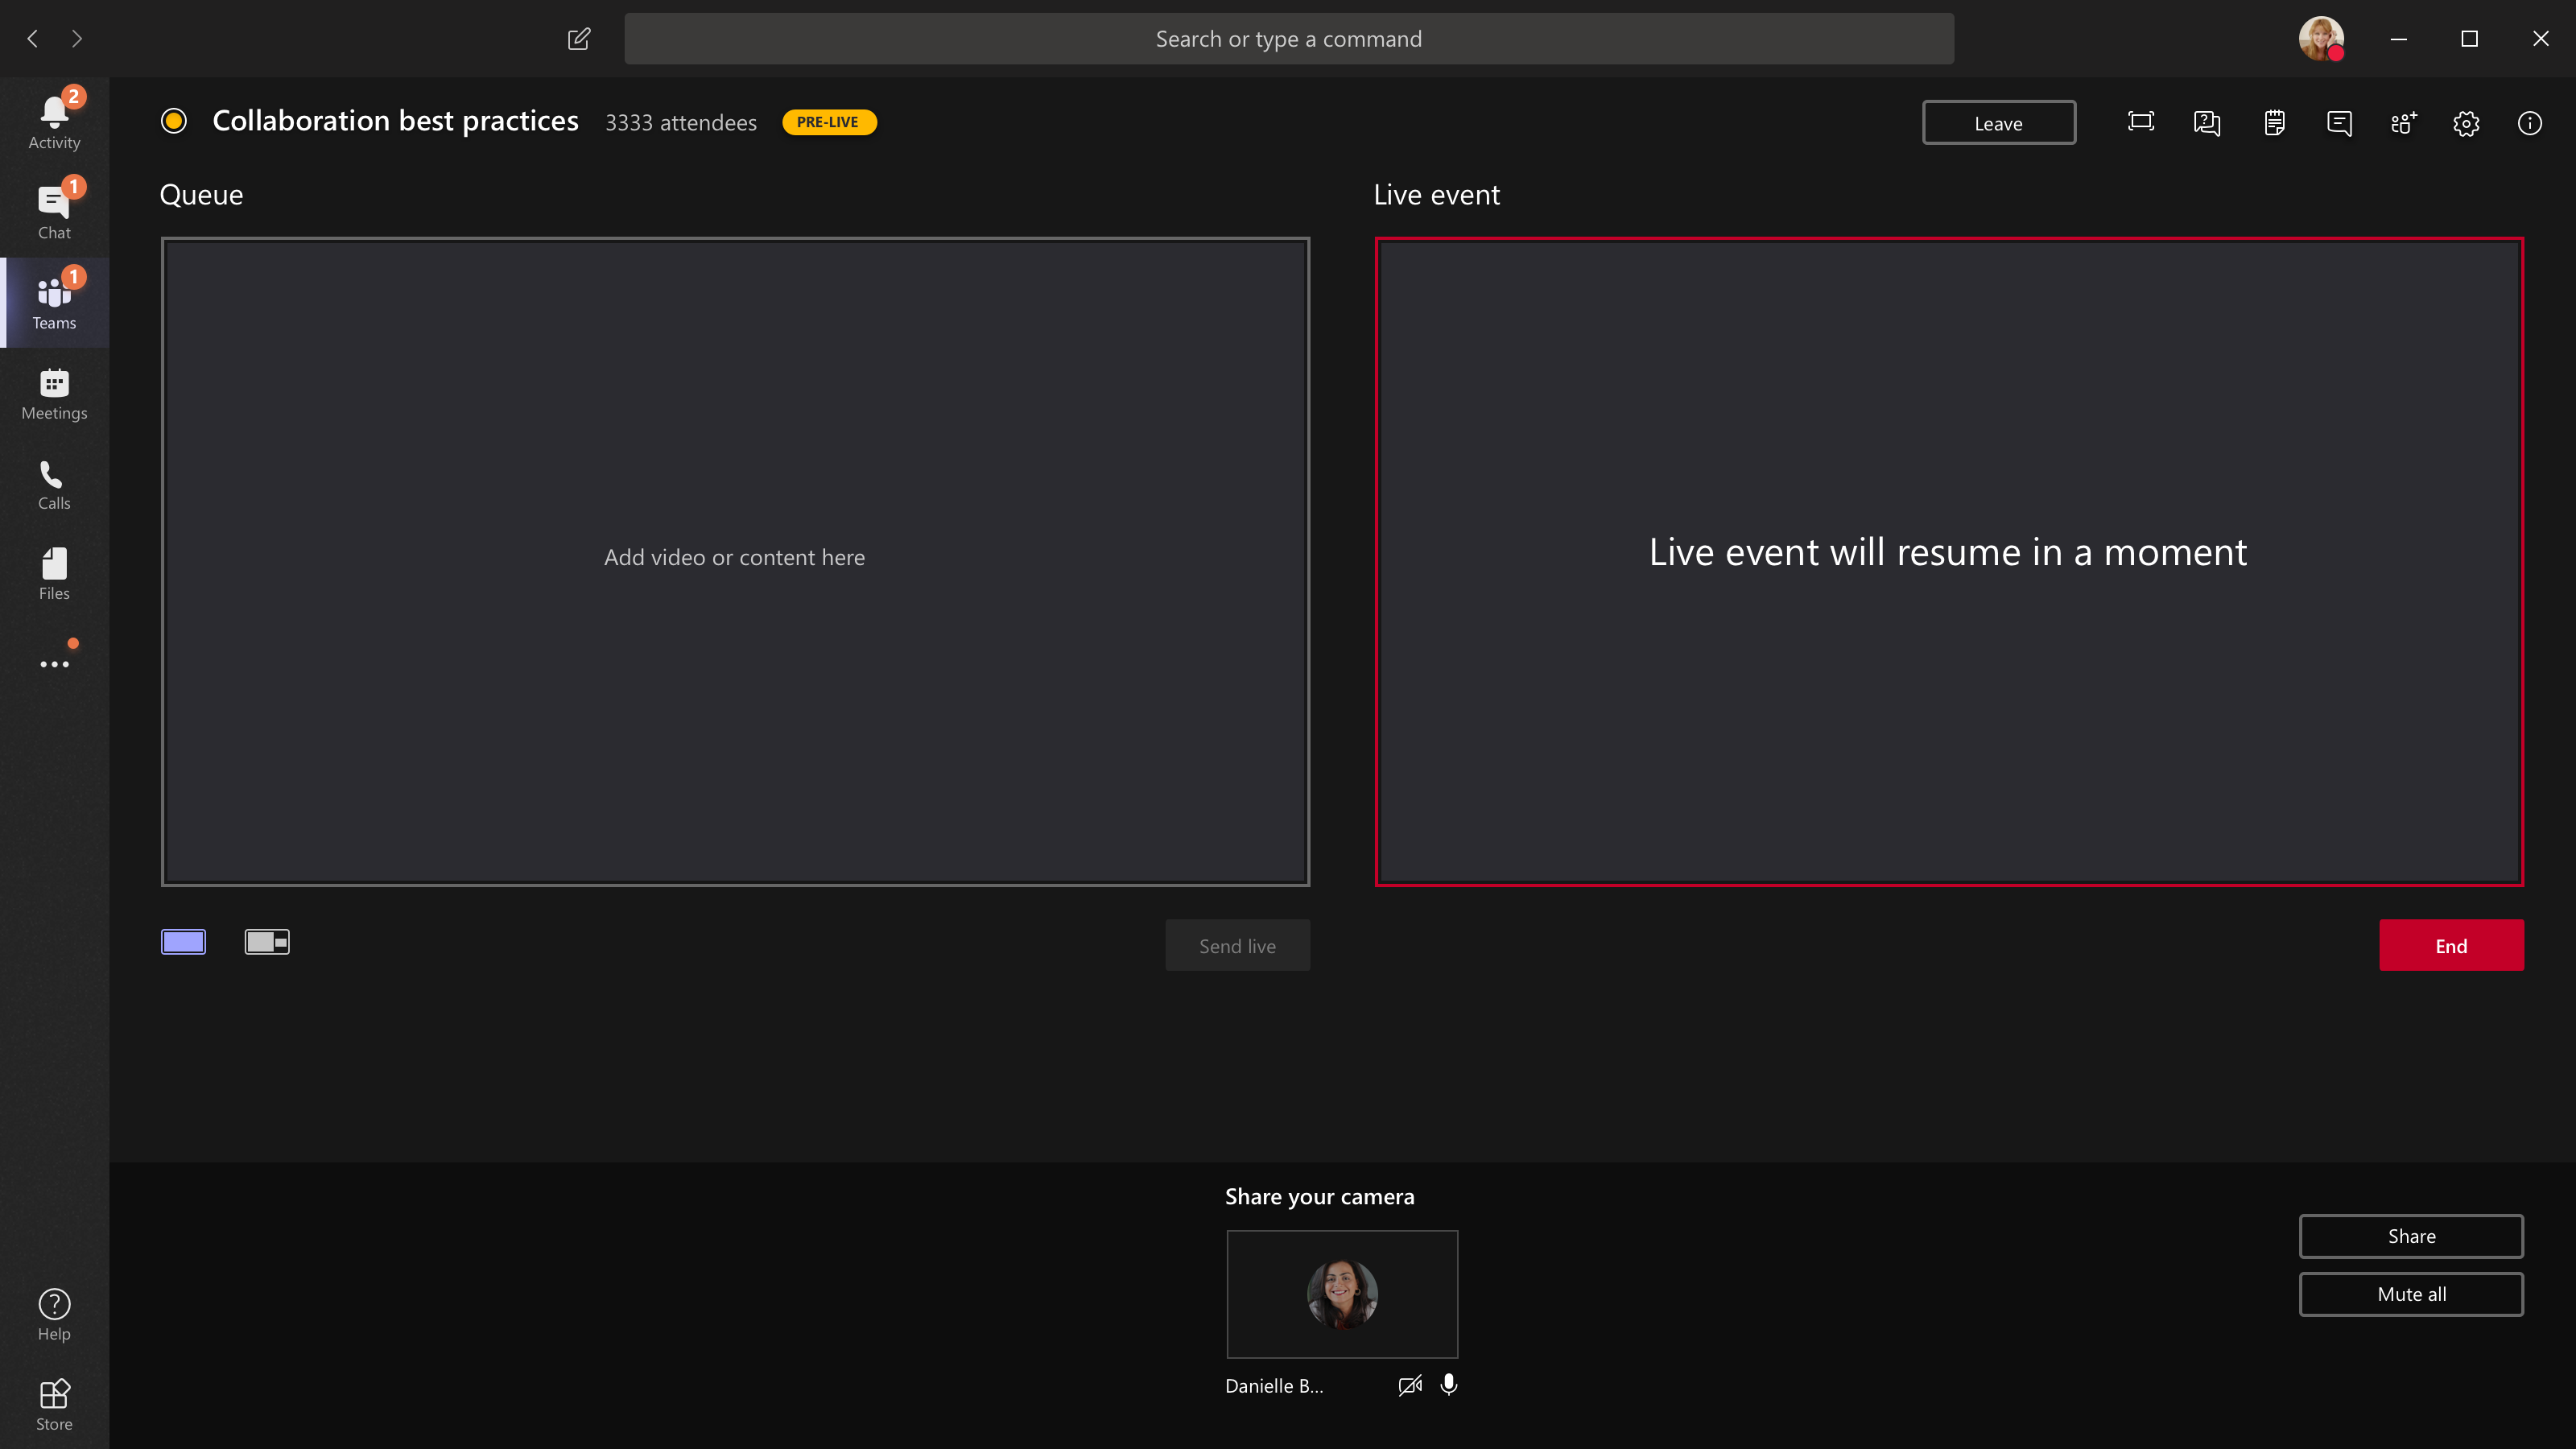
If you stop sharing video (by turning off your camera, for example), everyone will see Live event will resume in a moment.
-
To share your desktop or a window, select Share and then the screen you'd like to share.
Tip: If you're the only producer in the event, we recommended that you use multiple monitors or share specific windows (instead of your whole desktop). Otherwise, everyone will see Teams (and your selections) when you make a change. With multiple monitors, you can queue content in Teams on one screen and have the shared content on the other.
If you're producing your event in Teams, here's how to share your desktop or a window:
-
To share the desktop, select Share > Desktop > Content > Send live. If the event hasn't already started, select Start.
Important: We don't recommend sharing a video this way.
-
To share a window, select Share and select one of the open windows from the Windows section in the source tray. Once the window is shared, switch over to the producer UI, select Content and then Send live. If the event hasn't already started, select Start.
Note: Do not minimize the selected window, as this would prevent a preview from showing in the queue.
To stop sharing the desktop or window, select Stop sharing in the call monitor window. As a best practice, you can invite a co-presenter to the live event, who can then share the desktop or window, which you can then queue for streaming into the event. Again, this will help you avoid showing Teams (and your queue) to your attendees.
-
To queue another video feed, you’ll need other presenters to join the event. Their feeds will show up on the bottom of your screen.
Notes:
-
Up to ten presenters or producers (including you) can share video or content at once.
-
If your content is live, other presenters or producers can start sharing their screens by selecting Share. Make sure that the event team is aware of this potential conflict.
-
If you are producing your event from an auditorium and there's an in-room audience whose reactions (laughter, clapping, etc.) you want captured in the live event, you can turn off noise cancellation. Just select Device settings and then turn off Noise cancellation from the device settings pane.
-
To ask a presenter to join a live event, select Participants  , and find the person you want to join (If you already invited them, their name will be in the list. If not, you can search for them.) When you find them, select More options
  by their name, then Ask to join
  . Teams will call them into the meeting.
If you ask someone to join, they'll join as a presenter, meaning they can speak, share their screen, participate in the event group's meeting chat, and moderate the Q&A. Anyone you ask to join will be removed from the event group meeting chat after the meeting.
-
To end the event, select End.
Remember—once the live event ends, it cannot be restarted.